I have recently joined another swap site, Your Paper Pantry (YPP). There is a small yearly fee ($12) to join, but I think it will be totally worth it. Everything looks like it runs so smooth there. I like that the swaps are run on a very strict timeline. The crafters there are amazing! I love looking at all their swap goodies on YouTube and watched the videos for many months before deciding to join YPP.
At YPP they have a rule that all new members must complete 3 months of group swaps before they can do a partner swap. At first, I was a little disappointed, but then I realized that this is for the "safety" of everyone. If you prove that you can be responsible for sending in group swaps on time, then it makes it a little easier to trust you to do your best and follow the rules for partner swaps.
So, without further ado...here is my first group swap for YPP: March Lunch Bag Upcycle with the theme of Birthday.
These bags ended up very different than how I envisioned them when I started. I have this ribbon that has confetti and "happy birthday" in red, green, yellow, and blue. I really wanted to use that ribbon for this project. The problem~I couldn't find an image to match. One of the requirements of this swap is to use a digital image on the bag. Since I couldn't find anything I liked, I decided to pick some paper out of my stash and start there. I used this beautiful paper from Basic Grey, K&Co, and Recollections (for the plain cardstack). I went to one of my favorite vintage image sites, The Graphics Fairy, and just did a search for "birthday" and this digi was one of my choices. I loved it immediately! The colors are a perfect match to the paper that I chose.
I printed the image about 2.5"x4" and then placed it on a mat made with Bazzil cardstock. I inked the edges of all my paper and my image with Vintage Photo Distress Ink. The picture had green gems in the corners so I dug through my stash of gems until I found 4 matching gems to place over them. I don't have any Stickles, so I just used some Elmer's glitter glue on the white flowers in the middle. I originally put some gray/silver glitter around the "beaded" portion of the frame, but I didn't like it since the frame doesn't actually go all the way around the image. I kept that one for myself and did the rest of them without the glitter around the frame. I guess the recipient can add it on there if they choose. :)
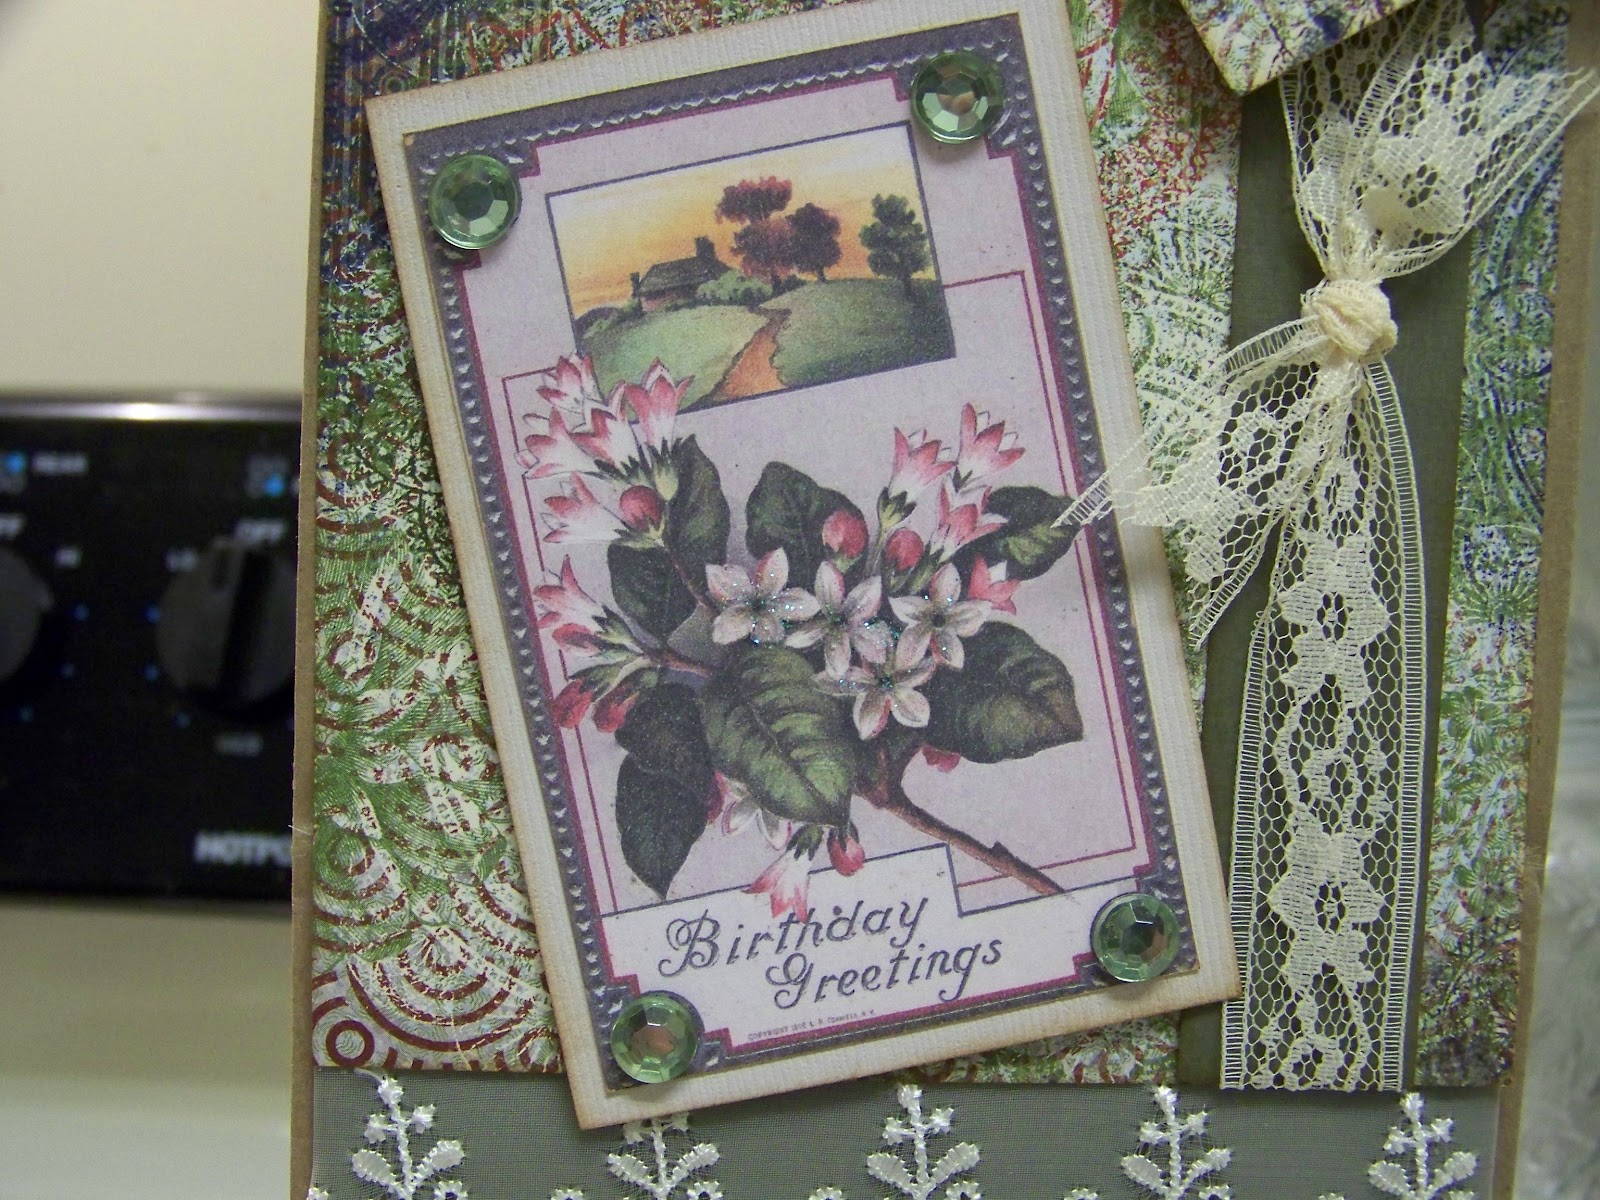
I received this beautiful piece of wide lace in a swap from my new swap buddy, Julie, in Australia. Thanks, Julie! She also sent the other piece of lace that I used on this bag.
I can always use birthday gift bags and I can't wait to get my swaps back at the end of this month to see what great things I received!
Tuesday, March 13, 2012
Sunday, March 4, 2012
Vintage Grunge Flower Swap
I am working on my flower collection so I have joined another flower swap at Mini Album Scraps. The theme for this swap was "vintage grunge" and the flowers had to be made out of book or music pages. For the two larger flowers I used a book that I picked up from the Dollar Tree. For the smaller flower I used a vintage dictionary page from The Graphics Fairy.
For this large flower I used the Sizzix 3-D Flower #2 Die. I wanted to use both of the large flowers from this die but they are so LARGE. This flower is pretty close to 4". I'm sure it's going to get squished in transit. Hopefully, it will fluff back up and be as good as new.
I found a tutorial *somewhere* on YouTube for this flower.
I learned how to make this flower from YouTube, as well. It's just 8 circles all scrunched up around a brad. Pretty simple.
For this large flower I used the Sizzix 3-D Flower #2 Die. I wanted to use both of the large flowers from this die but they are so LARGE. This flower is pretty close to 4". I'm sure it's going to get squished in transit. Hopefully, it will fluff back up and be as good as new.
I found a tutorial *somewhere* on YouTube for this flower.
I learned how to make this flower from YouTube, as well. It's just 8 circles all scrunched up around a brad. Pretty simple.
Folded Journal Spot Swap
I created these journal spots for the February Journal Spot Swap at Mini Album Scraps. This month we had to make a journal spot that had a fold. Any type of fold was acceptable as long the journaling is inside a folded project.
I used two sheets of patterned paper from the Cotton Tails line by We R Memory Keepers. I made my journal spot from one of the invitations on the Wild Card cricut cartridge. I cut it at 4". I picked up the trim along the bottom from Hobby Lobby. I also included 4 tags cut at 4.5" (from Tags, Bags, Boxes & More cricut cartridge).
Check out the video below for all the scrappy details. :)
I used two sheets of patterned paper from the Cotton Tails line by We R Memory Keepers. I made my journal spot from one of the invitations on the Wild Card cricut cartridge. I cut it at 4". I picked up the trim along the bottom from Hobby Lobby. I also included 4 tags cut at 4.5" (from Tags, Bags, Boxes & More cricut cartridge).
Check out the video below for all the scrappy details. :)
Wednesday, February 15, 2012
Stick Pin Swap
These stick pins were made for a swap at Life on the Scrapbeach. The theme was Love/Valentine and the colors were red and pink. My group included 3 other people, so I made 3 sets of stick pins. I will mail them in and get back 3 different sets from my swap partners.
I made the matchbook to hold the stick pins. I used DCWV paper to cover my matchbook and used a square brad for the closure.
We were supposed to make 3 pins with 3 or more beads on each pin. I really wanted to use the black and red beads, but since the black bead was so large, I could only fit 2 beads on the pin. I just included it as a bonus pin. I colored the pearl head with a sharpie marker. I liked the look of the black pearl instead of the white one.
The black and read beads came from Hobby Lobby. The rest of them came from Tuesday Morning and The Dollar Tree.
I have just started making stick pins and I'm really enjoying it. My bead collection is growing and I need to find another storage solution besides the ziplock bags that I have been using!
I made the matchbook to hold the stick pins. I used DCWV paper to cover my matchbook and used a square brad for the closure.
We were supposed to make 3 pins with 3 or more beads on each pin. I really wanted to use the black and red beads, but since the black bead was so large, I could only fit 2 beads on the pin. I just included it as a bonus pin. I colored the pearl head with a sharpie marker. I liked the look of the black pearl instead of the white one.
The black and read beads came from Hobby Lobby. The rest of them came from Tuesday Morning and The Dollar Tree.
I have just started making stick pins and I'm really enjoying it. My bead collection is growing and I need to find another storage solution besides the ziplock bags that I have been using!
Tuesday, February 14, 2012
Stick Pin & Charm Swap
I created this tag for my new swap buddy, Sharon. We were swap partners at A Lil Scrap of Heaven for the Spring Stick Pin, Charm, & Tag Swap. For this swap, we needed to create 1 charm, 2 stick pins, and a pretty tag to display them.
The stick pins are displayed on the front of the tag. The butterfly is a charm from the jewelry department at Hobby Lobby. I just attached it with a glue dot so Sharon can take it off and use it on something else if she wants.
I started making these tulle flowers recently. They are so simple to make and I have been putting them on everything! I think this is my 3rd project with them. :) There is foam tape between the medallions. That is how the stick pins are staying where they belong.
There wasn't enough room on the front of the tag for the charm, so I used it to dress up the back. I'm going to write a note to Sharon on the green tag.
This was really my first time making a charm. It was fun! The smaller beads came from my friend Katie. She is contributing to my habit of making stick pins and charms. The large beads with the gold swirls came from a dollar store that recently opened. You will be seeing these beads again in the future. I'm participating in a "Pastel Pin Swap" in March and I bought enough to make pins for that swap as well.
I made a small bead spray with beads that came from the Dollar Tree. The bead spray is just tucked into the pocket so Sharon can take it out and use it on another project.
I had a lot of fun with this swap. I hope Sharon enjoys these as much as I enjoyed the set she made for me!
The stick pins are displayed on the front of the tag. The butterfly is a charm from the jewelry department at Hobby Lobby. I just attached it with a glue dot so Sharon can take it off and use it on something else if she wants.
I started making these tulle flowers recently. They are so simple to make and I have been putting them on everything! I think this is my 3rd project with them. :) There is foam tape between the medallions. That is how the stick pins are staying where they belong.
There wasn't enough room on the front of the tag for the charm, so I used it to dress up the back. I'm going to write a note to Sharon on the green tag.
This was really my first time making a charm. It was fun! The smaller beads came from my friend Katie. She is contributing to my habit of making stick pins and charms. The large beads with the gold swirls came from a dollar store that recently opened. You will be seeing these beads again in the future. I'm participating in a "Pastel Pin Swap" in March and I bought enough to make pins for that swap as well.
I made a small bead spray with beads that came from the Dollar Tree. The bead spray is just tucked into the pocket so Sharon can take it out and use it on another project.
I had a lot of fun with this swap. I hope Sharon enjoys these as much as I enjoyed the set she made for me!
TP Mini-Parisian Storefront
I made my first TP roll mini album. :) This is for a swap at Life on the Scrapbeach. We had to decorate both sides of the TP roll and make a tag for the middle. We decorated 6 rolls and mailed in 5. We will get 5 different ones in return and then we can make our own 6 page mini album. In order to keep things cohesive, we had to use black and pink as our main colors.
Paper: Love Notes by Kaiser Craft and Kissing Booth by Basic Grey
Trim: Hobby Lobby
Stick Pins: I made them just for this swap.
I used Black Soot Distress Ink on all the edges.
I submitted 2 pages for this swap. Here is the first one. I glued the trim down on the bottom and side edges in order to make a pocket. There are 3 small tags inside. I inserted the stick pin in the back of one of the flowers.
The back has an accordion fold album. It's glued down on 3 sides in order to make a pocket for another tag.
This is my second entry. I used the trim to make a band to hold a few tags. It's just glued down on the ends. A homemade stick pin is inserted through one of the flowers in order to hold it in place.
This is the back. It has a waterfall mini album. Like the other mini album, it's only glued on 3 sides so that I could make a pocket for a tag.
Check out the following video for all the scrappy details. :)
Paper: Love Notes by Kaiser Craft and Kissing Booth by Basic Grey
Trim: Hobby Lobby
Stick Pins: I made them just for this swap.
I used Black Soot Distress Ink on all the edges.
I submitted 2 pages for this swap. Here is the first one. I glued the trim down on the bottom and side edges in order to make a pocket. There are 3 small tags inside. I inserted the stick pin in the back of one of the flowers.
The back has an accordion fold album. It's glued down on 3 sides in order to make a pocket for another tag.
This is my second entry. I used the trim to make a band to hold a few tags. It's just glued down on the ends. A homemade stick pin is inserted through one of the flowers in order to hold it in place.
This is the back. It has a waterfall mini album. Like the other mini album, it's only glued on 3 sides so that I could make a pocket for a tag.
Check out the following video for all the scrappy details. :)
Sunday, February 5, 2012
Springtime Up-cycle Gift Bag
These gift bags are for an "up-cycle" gift bag swap at Mini Album Scraps. The general idea is to use items you already have to decorate brown paper lunch bags. I used items already in my stash except for the tulle to make the flowers. I picked that up at the Dollar Tree, so that wasn't too much money to spend. :)
Paper: K&Co Black and White Fusion
Flowers: Recollections
Fibers, ribbon, lace, and bling are all from my stash
Black Soot Distress Ink
I used this video to make the tulle flowers. They were really simple to make. I used this video to learn how to make the bead spray. The beads came from my friend, Katie. (Thank you Katie!)
I distressed all the edges with Black Soot Distress Ink. I used a strip of the left over paper to create a little card that is tied on to the ribbon closure at the top. The folded size is about 2.5"x3". Since this paper is double sided and the inside the black polka dot, I lined one side of the card with a piece of plain white cardstock.
Paper: K&Co Black and White Fusion
Flowers: Recollections
Fibers, ribbon, lace, and bling are all from my stash
Black Soot Distress Ink
I used this video to make the tulle flowers. They were really simple to make. I used this video to learn how to make the bead spray. The beads came from my friend, Katie. (Thank you Katie!)
I distressed all the edges with Black Soot Distress Ink. I used a strip of the left over paper to create a little card that is tied on to the ribbon closure at the top. The folded size is about 2.5"x3". Since this paper is double sided and the inside the black polka dot, I lined one side of the card with a piece of plain white cardstock.
Subscribe to:
Posts (Atom)


